Join Us for Our First Ever LIVE Video Event!

How to Adapt and Create Quilting Patterns w/ Slice of Pi Quilts

Find Out How to Adapt & Create Original Quilting Patterns

Princess YellowBelly Designs logo

Hello to all of our wonderful Princess YellowBelly members!

If this is your first time here, then no worries, we’re about to do a first of our own. And if you’ve been with us for a while, then you know that the announcement that we’re about to do a live interview – our first every live video event ever – isn’t an exaggeration.

We enjoy doing video, and doing live interviews has been a dream of our for over a year.

And now it’s finally about to happen, thanks to a true friend and fellow innovative fabric artist Laura Piland from Slice of Pi Quilts.

Slice of Pi Quilts – Original Quilting Patterns

Laura’s already shared a bit of her amazing story of how she creates amazing quilting patterns and how we’ve adapted one of hers. I highly recommend reading her story before you join the video, to find out more about Laura beforehand, and figure out questions that you’d like to ask her live!

We’re sure excited to get to talk to her about creating and adapting original quilting patterns. Please do make sure to join us live for an interesting conversation with questions like:

  • How many patterns have you adapted?
  • Do you have a standard method for adapting patterns?
  • How do you get ideas for new quilting patterns?
  • What’s your process for creating a new pattern?
hydra scales original quilting pattern facebook live interview

See you there this afternoon, September 28 @ 4 PM (Eastern Standard Time)!

*If for any reason you can’t join us live, the replay will be available on our Facebook page, and we’ll be seeing what we can do to share it here, as well.

See you there!

Piercing the Home Sewing Way

A needle sticking into the seamstress's finger - one of the consequences of sewing dangerously

Living & Quilting Dangerously

Last week I went to a Tattoo & Piercing Parlor.

It wasn’t the first time I’d been there but I sincerely hope it will be the last…and I wasn’t there to get a tattoo either.  I’m a good girl, I am!

I went to the piercing parlor to get a Daith piercing in my ear to try to help my migraines.  I confess to yelling when he pushed that needle through my cartilage – that sucker hurt.

However, as I sat there quietly bleeding, it occurred to me.  I do this to myself all the time – when I sew – and I bet you do too.

Sewing is a physically risky business because essentially we’re working with knives.  Of course, we like to give them euphemisms like scissors, pins & needles, and rotary cutters, but any seamstress can tell you…they’re really knives.

Personally, I’d be amazed to hear that there is one seamstress out there that hasn’t had a too close encounter with the sharp end of one of these supplies.  They are necessary to our work, but they can be very painful.

Addiction – And How Not to Treat It

Here again is where the whole idea of addiction can raise its head.

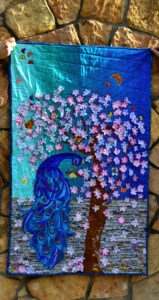
When I was sewing my Peacock Panel, I had to pin every flower in place before I could sew – no handy Wonder Under here.

I used long, sharp quilting pins to secure those slippery leaves to the thick background.  Those very helpful pins found no problem scraping along my forearms and jabbing into my chest as I sewed.

I’m pretty sure I yelled more than once, and when I was done, I did look like an addict with needle tracks all along the insides of both forearms. Talk about quilting dangerously.

Peacock Paradise fabric art wall hanging - a fabric art project that took us to new levels of quilting dangerously

But it was worth it.

Michael thinks I’m nuts sometimes, but even he has to admit the end result was beautiful.

That’s the gritty truth of an artist’s addiction to his/her craft.  No matter the ill immediate consequences that we suffer personally, nothing will deter us from achieving our goal of adding a bit of beauty to this old world.

Maybe we shouldn’t even want to.  Without a bit of pain no one would have ever painted the Mona Lisa, or built the Parthenon, or invented quilting in the first place.

Those Who Love Us

Speaking of my darling Michael, have any of you ever read or heard Hank the Cowdog books?  They are positively hilarious – especially the audio book versions – but when you read about Slim Chance, just substitute Michael’s name instead.

This man of mine never moves fast, leans as soon as he stops and takes forever to think things through.

To his credit, his thinking is vastly different from mine and he often comes up with a solution that would never occur to me.  He’s awesome, but I digress.

The point is that I’ve only seen him move fast 3 times:

  • When Suzanna decided an anthill was a perfect place to play
  • When the kids were playing in the ocean surf and a long dark shape showed itself in an oncoming wave
  • And when I sewed through my thumbnail

Yellow-headed pin going through a quilt into someone's finger!

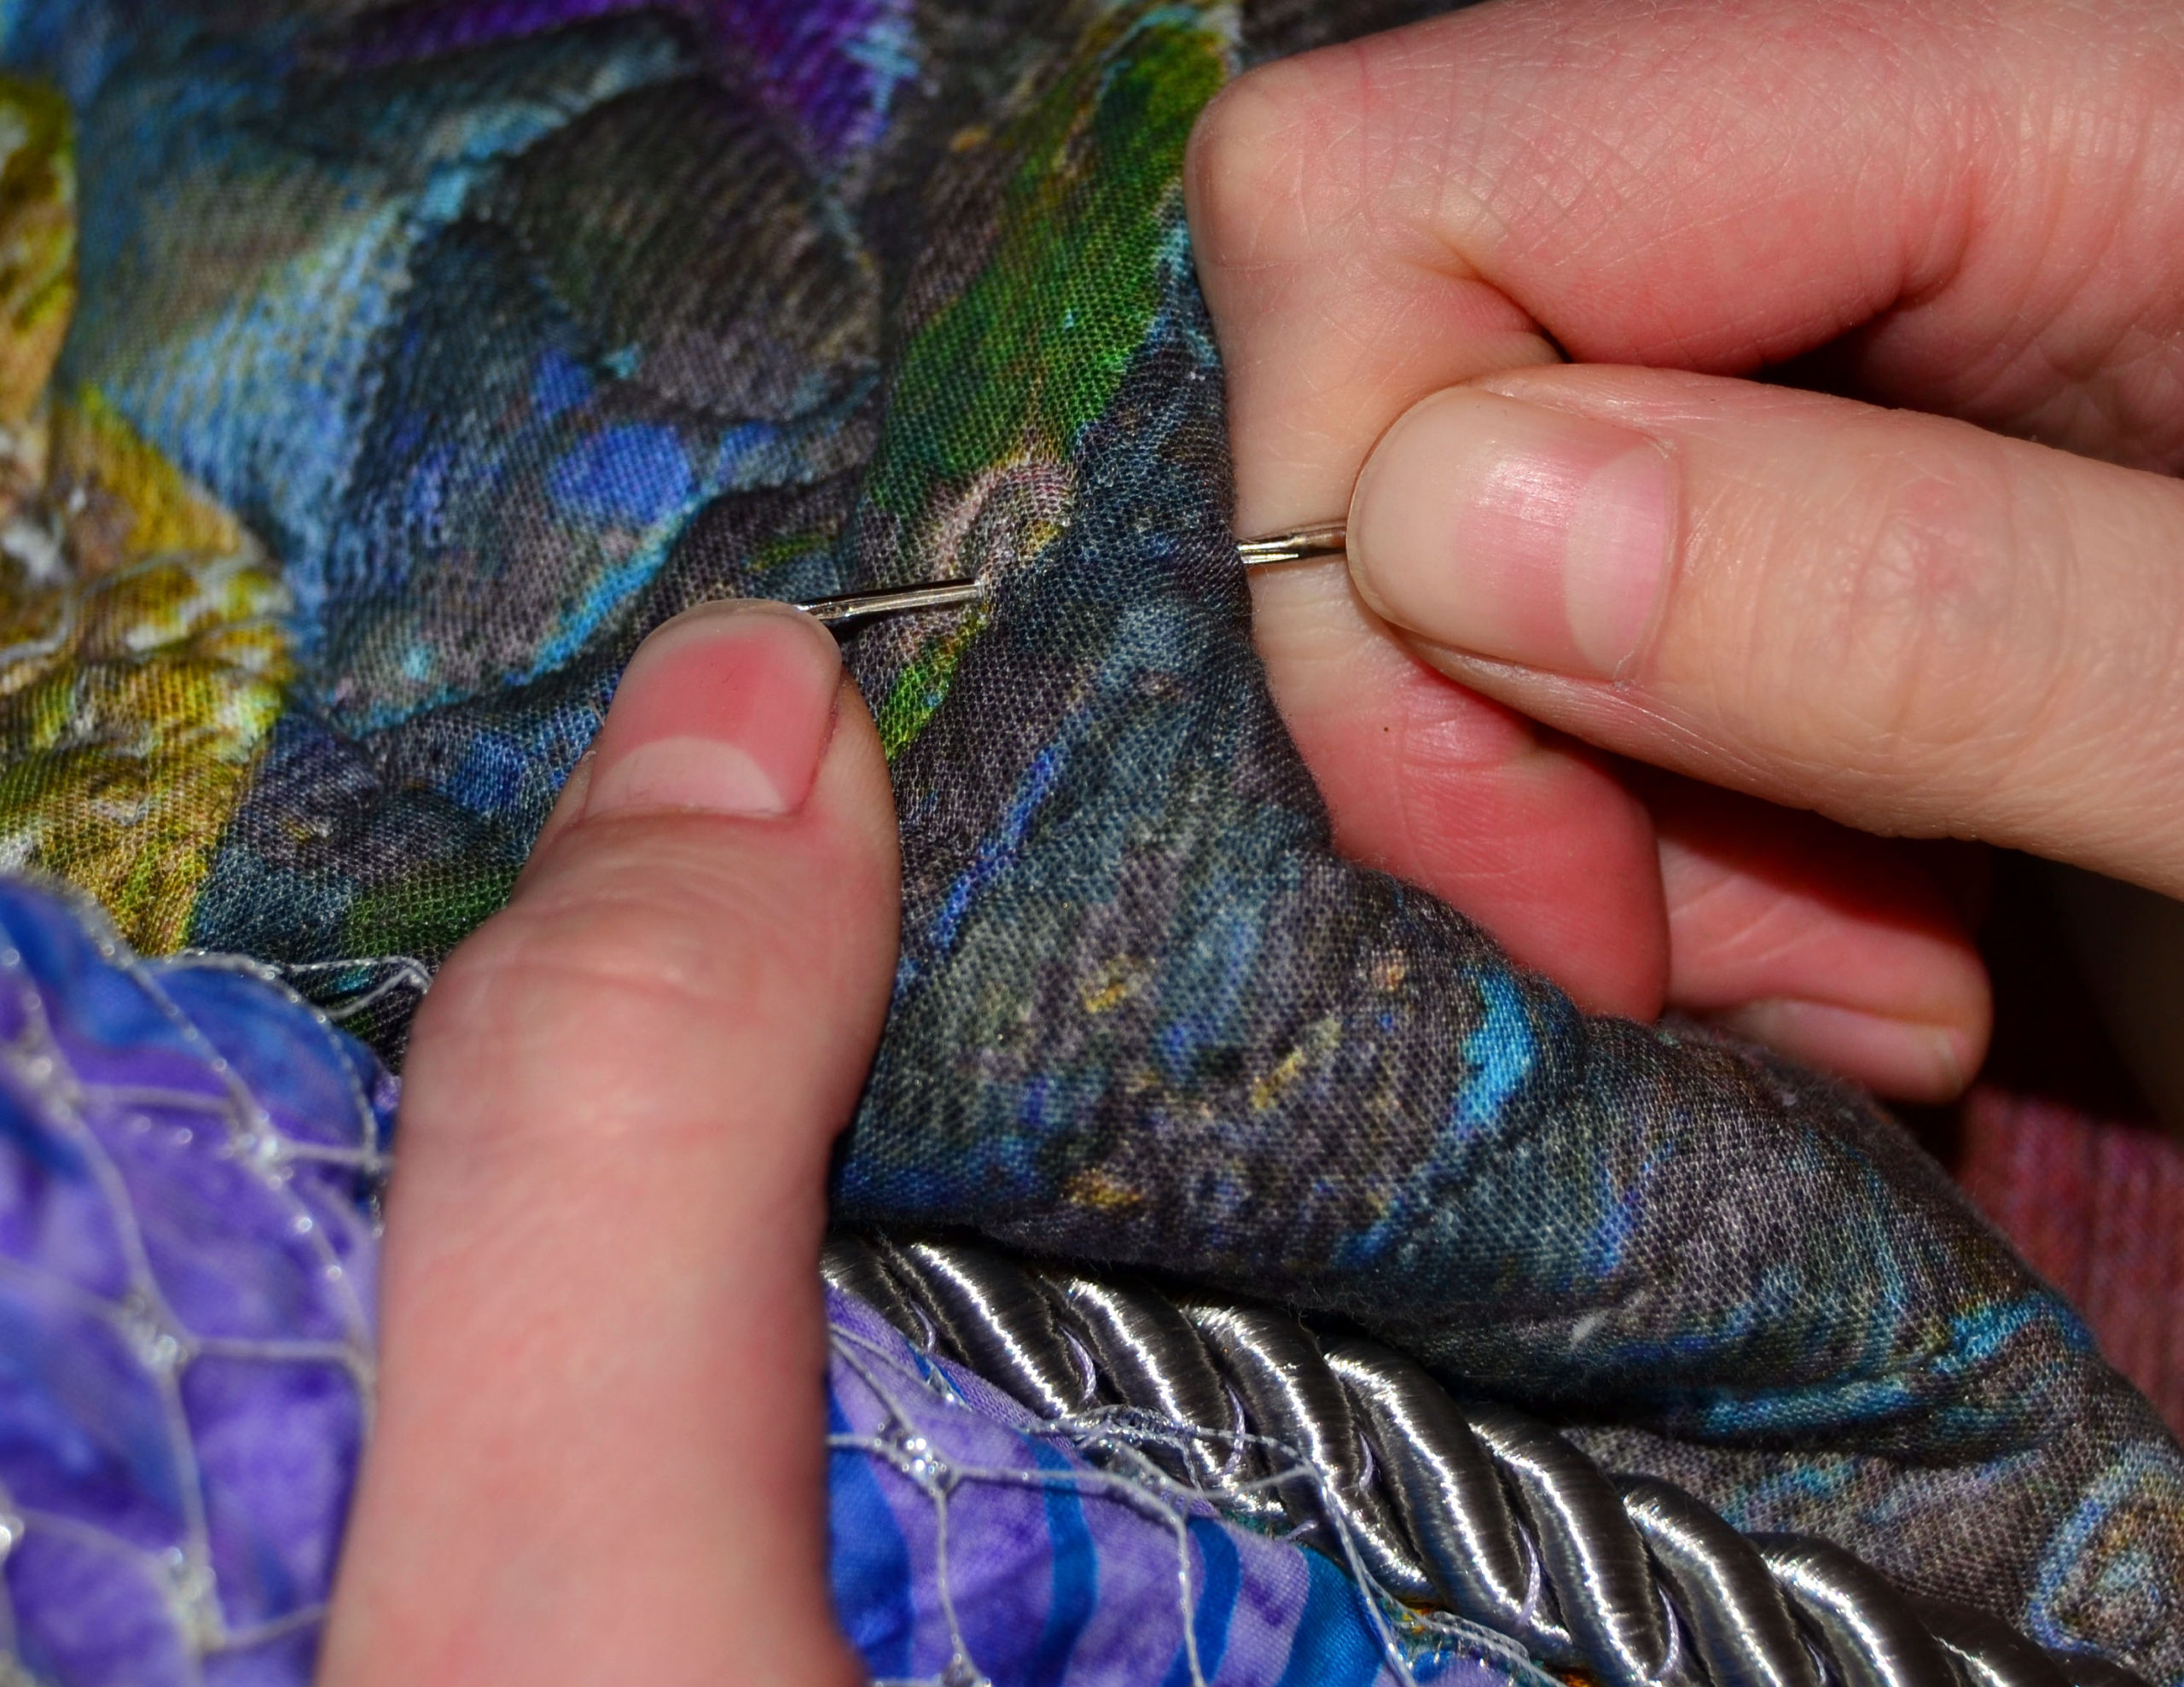
The needle had pulled out of the machine and was sticking out the fleshy side of my thumb through my thumb nail.  That was not fun.  Michael really jumped that time – I’m pretty sure that I screamed loudly.  Being Michael, he promptly got his needle nose pliers and pulled.

Amazingly, while it was the first time I’d sewed through my thumb nail, it wasn’t the first time I’d sewn through the side of my thumb.

Last year, I was having vision problems in my left eye.  But I live on the edge and do quilting dangerously, so instead of stopping, I kept leaning closer and closer to see what I was sewing and actually scraped the end of my nose with the needle. Now, that would have hurt!

Consequences of Quilting Dangerously

I have a special set of quilting pins that are about 3” long and sharp as lances, consequently many times I’ve had to wash out spots of blood from being stabbed.  On my dangerous quilting journey I also:

  • Been burned with hot glue
  • Shoved hand sewing needles under my fingernail
  • And glued various body parts together

But it’s all worth it to me – because like any true addict I like the results.  I read about one quilter who had actually glued her bottom to the floor.  I found that hilarious but not surprising.

So there I am getting pierced and looking at the piercing guy.  He’s tattooed from neck to ankles and I started thinking about how many needle punctures THAT took – and he did it on purpose!  Now that’s addiction – of a different kind, but addiction nonetheless.

So maybe we’re not as insane as we may seem – when we keep on quilting despite the hazards – and we have something to show for it at the end of the day.  And, at least our needle marks aren’t permanent.

Turning a Tidal Wave into an Ebb Tide

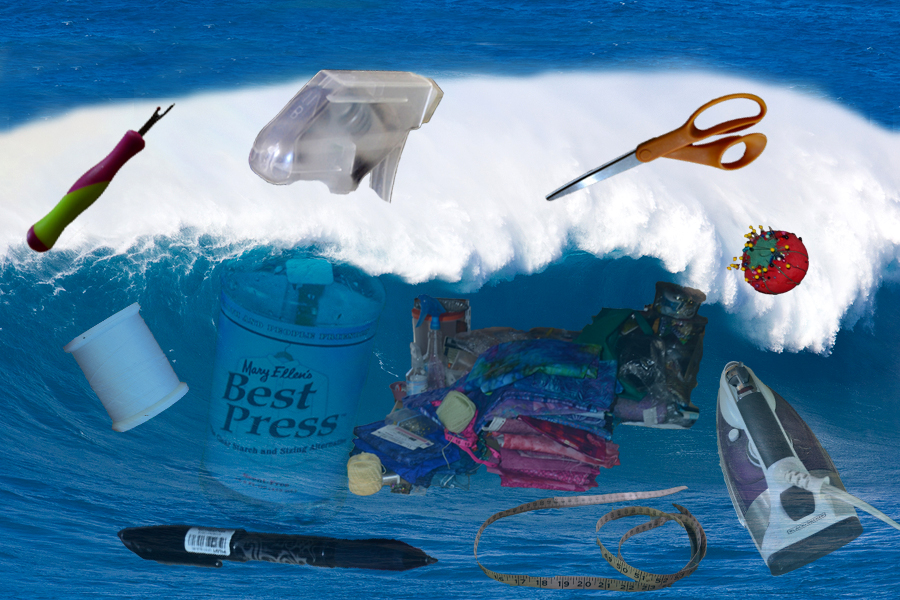
A tidal wave carrying sewing supplies; iron, fabric, measuring tape, marking pen, scissors, pin cushion, seam ripper, thread, spray bottle, and more

Getting the Best of Your Quilting Stash – Before it Gets the Best of You

You have a sewing space and sewing supplies.  The problem is that your sewing supplies will always – always – outgrow your sewing space.  Unless you start corralling clutter now, your quilting stash will cheerfully bury you under a massive tidal wave.

All quilters have a stash of some sort.

A stash is any fabric that is left over from a sewing project, or fabric that you’ve bought because you’re intending to do a project that never happens, or just fabric that you fall in love with.  For instance:

  • I absolutely LOVE all fabric that has an autumn theme, so I have a great deal of that.
  • Barb is physically incapable of passing up anything paisley, so her paisley stash is huge.

Keeping it all neat and organized is an issue that has to be answered by every seamstress.  Unless you’re one of those people who work best in an environment of total chaos, then the question of organization has to be addressed for your specific situation before you can even begin to sew.

Ways that I’ve Successfully Corralled Clutter

Over time you’ll develop your own ways to corral the mess and fuss that sewing and quilting generates.

To start with, though, I like to know what I’m going to have to store – and more importantly, where I can put my hands on it when I want it.  Having to search and search for something I know I have and want for a specific project frustrates me out the yin-yang and I become very unpleasant to be around.

I tend to buy ahead on any fabric I see that could be used in a fantasy type panel, so I’m always thinking of how I’m going to keep various materials that go with a specific project together and organized.

I also loathe dust and dusting, so I’m all about storing everything in closed containers.  Here is what I’ve learned.

Start Corralling Clutter by Defining Your Space

Look realistically at the space that is available to you.  Everyone’s situation is different and it changes with the times, so this is fluid.  I like to define how far my sewing tide can spread in the space available to me.

When you’re deciding this, look at places for your:

  • Sewing machine
  • Ironing board
  • Cutting space – typically a counter or table
  • And where you will store your stash.

For years I kept my sewing machine in the bottom of a closet and brought it out to sew with on the dining room table.  Now I have a desk where it sits all the time, and that is much more convenient.

For the first time ever, I also have the room to keep my ironing board set up permanently on my right side.  This is a huge convenience but not at all necessary.

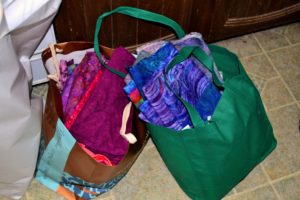
Big canvas shopping bags to hold supplies temporarily for a particular project - corralling clutter in the short term

Large shopping bags can be used to corral the clutter from a particular sewing project.  In this case we are using two big bags to keep the fabric, notions, and batting for a twin quilt in one easily accessed place while we work on various sections.

If you don’t have enough room for a permanent style sewing setup, make sure you put everything back every time.  Otherwise it will become a habit to leave it out and soon the clutter will be driving you insane.

Keep in mind that not all of your stuff has to be all in one space. 

I store my big rolls of batting and my rarely used tubs of notions in a small closet in the spare room. Barb’s sewing “room” is a small walk-in closet in her spare room and she manages to keep all her stuff neatly organized with shelves where she stacks her fabric and a peg board on the wall behind her machine to hang her thread spools on.

See if there are any cupboards, closets, drawers, or a lazy-Susan (cupboard turntable) you can commandeer for your supplies.

What about floor space or wall space? 

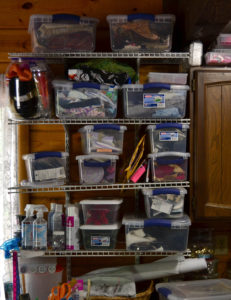
I was getting incredibly frustrated with my space when Michael suggested he put up some wire shelves in the 3 foot space on the wall between the cupboard and window.  He put up 4 short shelves for me, and that has made a huge difference to my frustration levels.

I like to keep as much of my fabric in tubs as possible. 

This is because I hate dust – this solution keeps my fabric clean and – as an added bonus – easily accessible.

I took the measurements of my shelves with me to Walmart and found clear tubs that would fit in that space.  Not all of my tubs are the same size.  I use the larger ones for material and then I got a bunch of smaller ones that fit on top of the larger ones for each shelf.  In these I keep my sewing supplies like iron cleaner, fabric glue, Velcro, markers, etc.

All of these tubs are clear so that I can see what’s in them without having to take them down and look.  I also purchased a few of those plastic pullout drawer filing cabinets that Walmart carries.  I set these wherever it’s convenient.  I like to use the big, deep ones for storing fabric.

Organize the way that makes sense to you. 

It doesn’t matter if no one else “gets” the way you corral clutter; it just has to work for you.  Even if it looks like a total disaster to an outsider – who cares?  You’ll know where you’re at.

I organize by theme and color.  I have 3 large tubs of autumn fabric, one of landscape fabrics, a Christmas one, etc.  Then I have my blue/purple tub, the teal/turquoise tub, my water fabrics tub, etc.

Wire shelves to hold sewing supplies, all the clutter corralled in  tubs

Wire shelving right above my sewing space helps keep all my most frequently used supplies, notions, and fabrics close at hand and still out of the way.

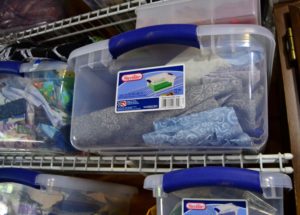
Large plastic tub full of color-themed grey and silver fabric

I use these fabrics frequently, 4-5 times a year.  Plenty of time for them to get filthy with dust and lint unless they are kept in clear plastic storage tubs.

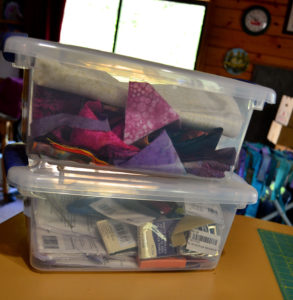
Corralling clutter with plastic tubs

A variety of ongoing projects and sewing supplies fit great into these smaller tubs.

Corralling Notion Clutter with Genre Jars

(Leiajoy came up with the genre jar name – BTW!)

Storing notions is something you need to give a great deal of thought to.  Because they’re usually smaller (like buttons and beads), or on rolls like ribbon, they can’t be stacked neatly in tubs.

I organize notions just like my fabrics – by color and theme.

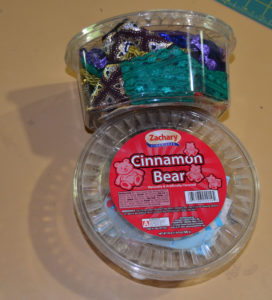
A genre jar can be anything from an empty candy tub to a glass jar with a fitted lid (like the kind you use for spices in the kitchen) to a Tupperware or plastic container.

Genre jars should really be clear or clear-ish, so that you can see what’s in them, and they should also have lids (the dust, you know).  Plastic works better for higher shelves – but you can use glass if you have a place to set them where they won’t be knocked off.

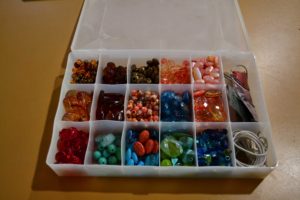
For small, easily lost items my solution so far has been to use the smaller plastic containers that have a whole bunch of small compartments for buttons, appliques, my thread, beads and smaller novelty items.  (These are very nice because they’re relatively small and flat, so they can be stacked neatly anywhere.)

Genre jars are also perfect for things like my decorative ropes, spools of ribbon, etc.  And they work well for bigger buttons, and feathers.  (I know that because I’m storing feathers in preparation for a tropical project.)

Another thing I’ve found works great is a hanging shoe rack.

These are cloth tubes with sort-of-shelves inside a canvas canopy.  They’re made to be hung from a ceiling hook, and the outside has small pockets that are just perfect for shoes – or fabric flowers, or large rolls of ribbon.

Plus a hanging shoe rack can be easily hung over any door.

Corralling Clutter with the “Great Thread Roundup”

I used to keep all my spools in a large wicker basket but this was a nightmare with ends tangling up and having to dig through the entire basket to find the spool I wanted.

Now I have a tub of Aurifil quilting thread.  It’s a plastic tub with 2 layers (1 of large and 1 of small spools.  I bought this as a set and I’ve never regretted it. It’s been 6 years now, and even though I quilt with these threads all the time, it looks as though I’ve barely started on it.

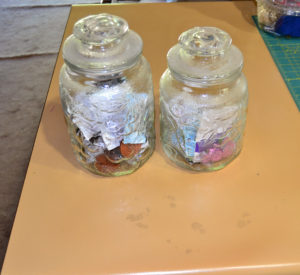
Old-fashioned crystal jars with solid lids used for corralling button clutter

These old-fashioned crystal jars are my button genre jars.  They work perfectly for keeping a variety of specialty buttons which come in odd-shaped packages.

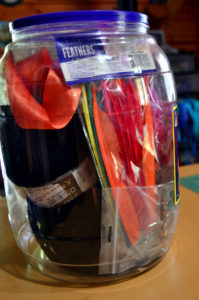
Large genre jar made from a plastic snack tub for holding large and bulky sewing accessories like large ribbons rolls, yarn and faux feathers

Junk food hath a few rewards.  One of them being that this once-upon-a-time cheese ball jar has, after being well-washed, pressed into service as my trusty genre jar of odd-shaped supplies like a roll of yarn and faux feathers.

Arguably my favorite method for corralling clutter – ever!  These small tubs are flat, simple, and hold those supplies that really tend to run away from you, like beads.  This is also my preferred case for regular spools of thread.

I also buy a lot of specialty threads, like metallics and variegated, so I bought a deep plastic thread tub with plastic spool holders built in.  This keeps those nicely corralled.

For leftover regular sized spools, I use the same plastic containers I use for my beads and buttons.  I have 4 of these and I organize them by color.  When I need a certain color, it’s only the work of minutes to find it.  These are great because they stack easily and neatly and keep the dust off of everything.

Some threads don’t have a tie-off built into the spool.  You can either stick them down with tape – a major pain – or store all these spools in a separate tub to minimize the damage.

Corralling your Sewing Supplies

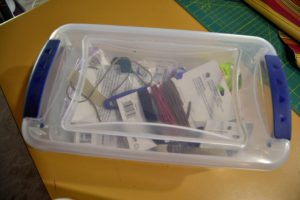
For the sewing supplies that I use on an almost daily basis, I purloined a Tupperware tub from my kitchen that had lost its lid.  In this I keep my scissors, pin cushion, rulers, corner turner, seam ripper, etc.

Besides being real handy, this topless solution allows me to simply grab whatever I need without bothering with lids.

Corralling Your Patterns and Books

You will inevitably end up with a great many patterns, books, and even plastic bags with your applique pieces.  My system is to keep all the books on one half of a shelf on the girls’ business bookshelf.

The patterns that come in in Ziploc bags – and the applique shapes – I file in a large plastic basket that I keep in the same closet as my batting.

Here’s to Your Success in Corralling Clutter!

Whatever storage system you eventually adopt you can be sure that the ebb tide will sooner or later swell to a tidal wave and threaten to overwhelm someone else’s space.

When this happens, the only thing to do is go through everything and sort like crazy.  You can’t keep everything so you have to be ruthless.  Give your throwaways to friends, or a thrift store, or your quilting guild, etc.

Plastic tub filled with sewing supplies used for corralling clutter

I can’t say it enough – clear plastic tubs are the way to go when it comes to corralling clutter.

Plastic candy tubs are used to hold specialty ribbons

These flat plastic tubs once contained Christmas candy.  But they are flat, with tight-fitting lids and they stack beautifully.  I generally use them to store odds and ends like specialty ribbons and appliques.  

If you don’t you’ll end up drowning under it all and that wouldn’t be very nice, now would it?

You will eventually develop a kind of working rhythm, but it’s always worthwhile to clean up every time you finish a project.  You’ll be less frustrated, and your clean-up won’t be such a major pain!

Help! My Husband Has My Sewing Machines

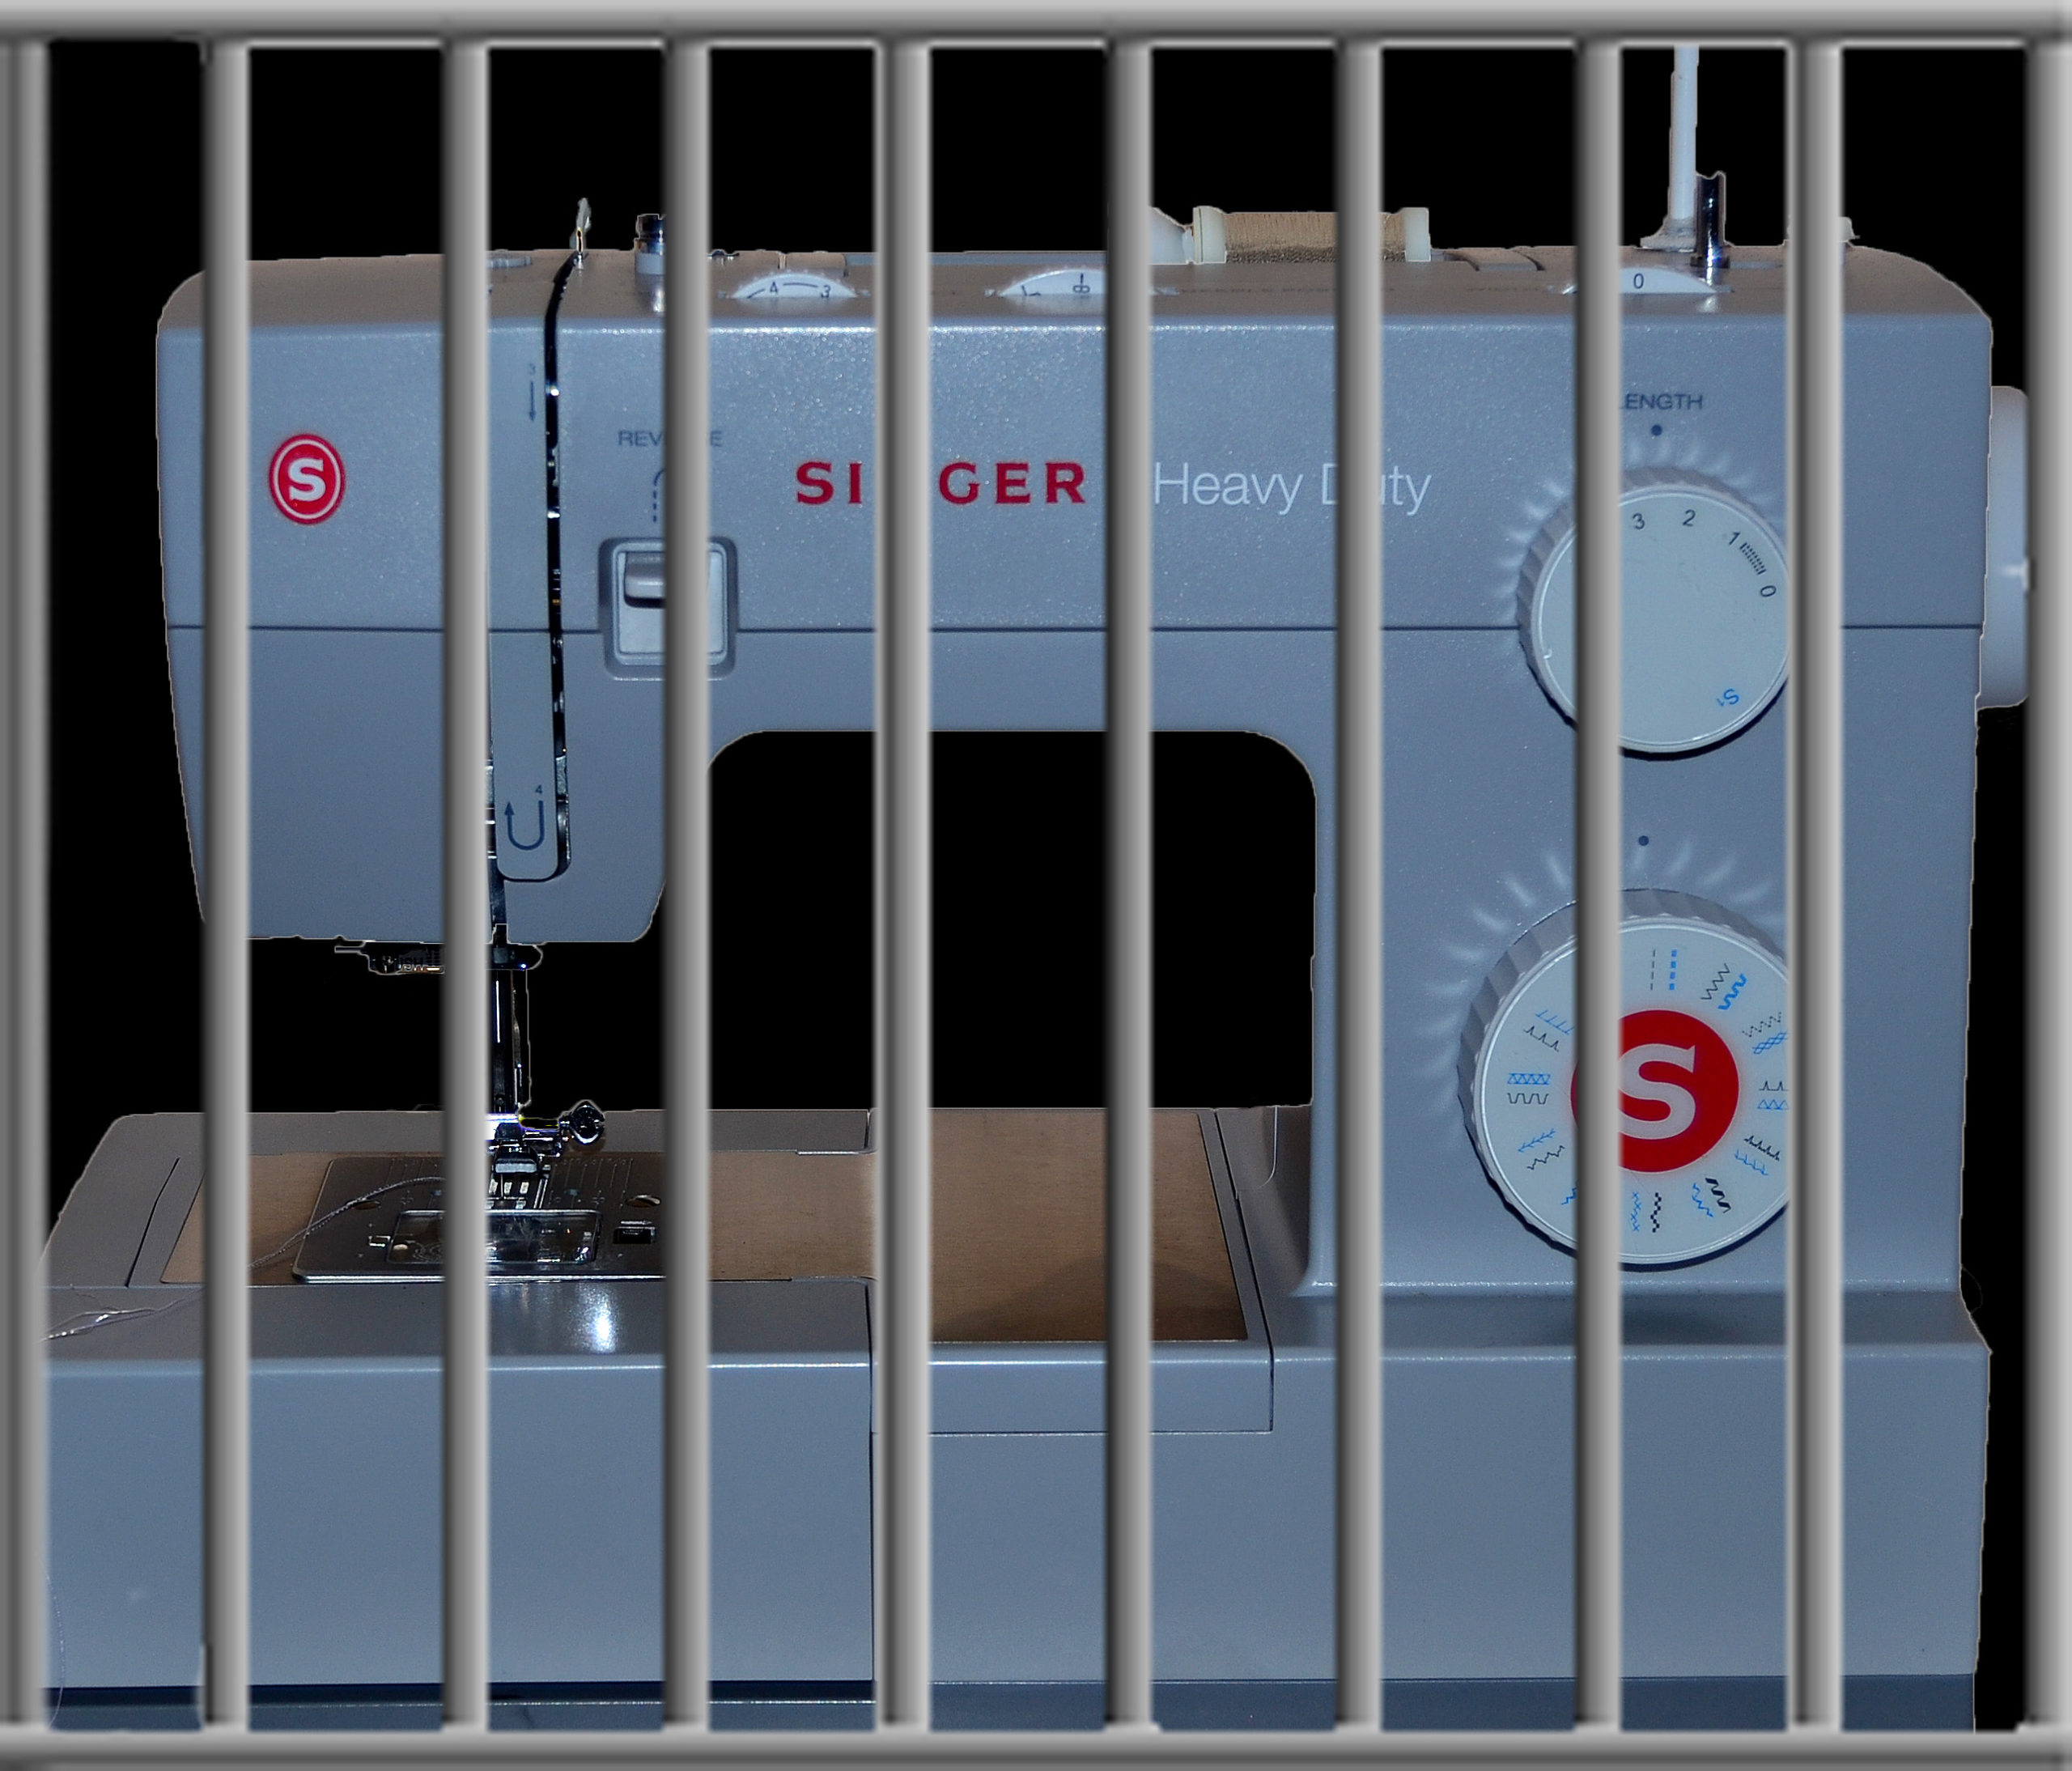
Singer sewing machine behind prison bars - representative of major sewing machine trouble

Dear Princess YellowBelly,

Help, my husband has my sewing machines!

My dear, dear husband is a jack-of-all-trades meets shade-tree-mechanic country charmer, and for 26 years I’ve never had to deal with the plumbing, the car, or even screw in a light bulb.

However, since we’ve both retired and I’ve taken up quilting as my hobby, he’s taken up sewing machine tinkering as his.

I have a high dollar Bernina and a Singer workhorse machine to handle all my different projects, and they both occasionally need tuning up – but he absolutely refuses to take either one in for an expert checkup.  And, as the laws of Fate or maybe even Murphy would have it, they always break down at the exact same time.

Sometimes my machines are on his workbench for months (we’re talking four or five at a time) while I twiddle my thumbs, feeling like an addict gone cold turkey.

I don’t want to waste money because he does eventually fix them, or hurt his feelings, because he’s doing it out of love, but I swear I’m about to start having withdrawal seizures.

What would you do?

Sincerely,

Sewing Machine Withdrawal

A

Dear Withdrawal,

Wow!  4-5 months without your sewing machine.  If I see someone crawling up the wall I will assume it’s you, not Spiderman.

That being said – please give your man a kiss from us.  Those hard-working, shade-tree mechanic types are few and far between, and they’re worth their weight in gold.  I should know – I’ve got one of my own.

My darling Prince BlueShoe isn’t such a creative guy, but he takes good care of all of us here, and most importantly – he makes sure that we get what we need to continue being creative.  And yes, I’ve seen the guts of my sewing machines spilled out all over his table more than once.

The Truth About Sewing Machine Trouble

We are all quite sure that there will be no sewing machine engineers – at least not any from the last century – in heaven.

Sewing machines, sadly, have a limited life, and they are created with components that break down over time.

This is especially true of the really fancy and expensive quilting machines from companies like Bernina and Janome.  (They make great machines, don’t get me wrong, but maintenance is a nightmare!)

Here’s some tips to help you out with your problem:

  1. Professional grade sewing machines aren’t supposed to be privately maintained

This standard is pretty regular.  Bernina and Janome both have their own certified technical repairmen for maintenance.

You can take this advice with about a tablespoon of salt, however.

Prince BlueShoe hates taking my Bernina in because it is very expensive, and he’s been doing it so long that he actually does a better job than the repairman – he’s just very, very slow at it.

This is a balance of love and necessity.

Your guy is probably right, constant professional repair is a rip off.  And once you’ve let him dig into your machine once, odds are you’ll never get him to quit.

Besides, who are we kidding?  Is our sewing ever going to trump loving our men?

  1. Allow your guy to regularly maintain your machines

This is something I struggle with.  I love to sew, not wait to sew.

But I’ve found that if I can conquer myself enough and allow Prince BlueShoe to do some basic maintenance after every two or three projects (on one machine at a time) I still get to sew on the other machine, and the sewing machine is back in service a lot faster.

  1. Do non-sewing stuff in the meantime

Your machines will always have the occasional sick day.  And there’s no reason for you to stop your projects cold turkey.

There’s a whole bunch of things you can do that won’t require a sewing machine.

  • You can clean your workspace

This will probably only take a day or two, but it’s always helpful to get your notions, fabric, thread, and other paraphernalia cleaned up whenever the machines are on the blink.

  • Prepare your next project

While your machine is on the workbench you can always do other sewing stuff.  Picking out fabric for a new project, ironing, cutting, or hand sewing.

For those of us who do big quilts without a long-arm machine, for instance, sewing machine woes might be a good time to finish a big quilt that was quilted in sections and needs to be stitch by hand to finish the backing.

Or you can cut out applique shapes for another projects.

  1. Have a “I’m putting my foot down” deadline

Your guy is wonderful, as is mine.  But they will take every inch and multiply it with hours.

Eventually – particularly if he’s messed up one of the computerized components – you may just have to say:

“You’ve had five months, and I want my machine back next week!”

  1. Make your own patterns

Sewing machine trouble time might be a really good time to look over what you’ve accomplished, what you would like to do, and learn how to make a project from scratch.

At the very least it’s a creative challenge – which is what your sewer’s mind is truly missing while your machines are fritzing out.

You’re not alone!  Sewing machine trouble gets to us all sooner or later.  I’ve seen my sewing machines’ guts spilled out across Prince BlueShoe’s worktable more times than I care to admit.

Don’t believe me?  Here’s photographic evidence…


Bernina Artista 170 - sewing machine trouble - something is very wrong!

Something’s wrong with the tension.  Off comes the cover, out comes the screwdriver, a couple of months down!

Tension dial on a sewing machine that has been taken apart

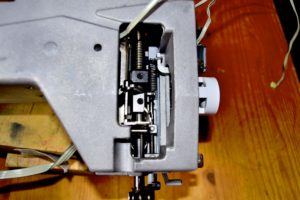
The needle won’t go down – off comes the cover, out come the little wooden shims and magnifying glass.  Lovely man – give me my machines back NOW!

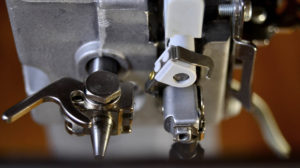
Needle drive compartment on a dismantled sewing machine

Ahh!  The agony.  My poor, poor needle driver is completely dismantled.  No sewing for a little while.

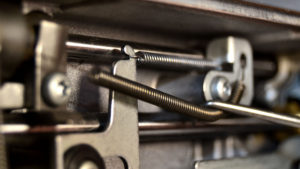
Spring on a sewing machine, trouble with a Bernina

This has something to do with something known as “timing.”  For those of you who own a professional grade machine and have a shade-tree mechanic working on it, you will learn about timing – and all the horrible circles of “H-E-double-toothpicks” reserved for the person who linked the timing to (I honestly stopped listening at this point, but it was very complicated).

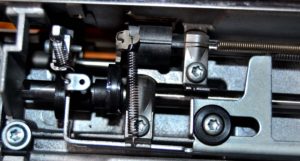
Inside of a Bernina Artista 170 - sewing machine trouble 101

Icky – more guts.

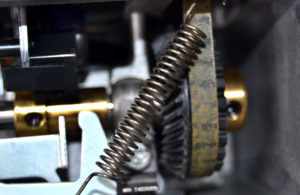
Close up of the guts of a sewing machine - loose spring

Hmm… That one was almost pretty.  Oh, I forgot – I have no sewing machine! 

What makes your sewing machine go - a look at sewing machines in trouble

Almost there!  Oops, famous last words.  Another month and I still don’t have a machine.  

  1. Read Princess YellowBelly!

You can always come and catch up with the great content on our website.

Finally: you’re not alone!

Everyone has slack periods, busy periods, dead periods, and purely frustrating periods in both life and creativity.

You’re not alone in it – and there’s always something else to be creative about.

With a hug for you and your man from your magically creative friends, and best wishes on getting your sewing machines, trouble free, soon!

Cordially & Sincerely Yours,

Her Serene Highness

Princess YellowBelly

The Road Less Traveled

a road less traveled in a yellow wood

How My Road Less Traveled Led to Fabric Art

At my high school graduation Robert Frost’s poem “The Road Not Taken” was prominently displayed in the auditorium.  This was the first time I had seen this particular poem and it resonated deeply within me.

It was probably because I had a rebellious gene passed down to me by generations of forbears that had resisted being physically or mentally imprisoned.

I decided then and there that no matter what I did on the outside of my life, my inner life would always be free – I would always follow the road where few others had gone before.

It was a decision that would come to define my life as “unconventional.”

Way Leading on to Way

My liberated attitude resulted in my having quite a few unconventional adventures, and dealing with the fallout and consequences of those adventures:

As you may know from your own life experiences, an adventure is something exciting and dangerous that happens to someone else and always turns out right.  When it’s happening to you it’s just plain terrifying and dangerous and there are often unpleasant consequences.

  1. Adventure: Spending two months on a short-term mission trip deep in the heart of the Amazon Rainforest
  • Consequence: Nearly dying from malaria
  1. Adventure: Putting myself through university to get a teaching degree at a time when my entire family all felt that higher education was not something a good Mennonite girl did
  • Consequence: I became fiscally independent
  1. Adventure: Spending my first year teaching on a Cree (Native Canadian) Reserve in the Northern Bush
  • Consequence: Handling a problem child who – at age twelve had a serious drug problem – and never, ever losing control of a classroom during the rest of my career
  1. Adventure: Teaching on a Hutterite Colony, grades K-9 in one room
  • Consequence: Discovered that I best liked being my own boss and in charge daily program
  1. Adventure: Spending a year teaching at a school for American military kids right on the DMZ in South Korea
  • Consequence: Insomnia – the constant raid drills and tension of living just a few miles from one of the most dangerous borders in the world left a lasting impression

The Road Not Taken

Poem by Robert Frost

Two roads diverged in a yellow wood,
And sorry I could not travel both
And be one traveler, long I stood
And looked down one as far as I could
To where it bent in the undergrowth;

Then took the other, as just as fair,
And having perhaps the better claim,
Because it was grassy and wanted wear;
Though as for that the passing there
Had worn them really about the same,

And both that morning equally lay
In leaves no step had trodden black.
Oh, I kept the first for another day!
Yet knowing how way leads on to way,
I doubted if I should ever come back.

I shall be telling this with a sigh
Somewhere ages and ages hence:
Two roads diverged in a wood, and I—
I took the one less travelled by,
And that has made all the difference.

  1. Adventure: Reluctantly being goaded into sending a letter to a man in America that one of my fellow teachers from Korea knew
  • Consequence: Marriage
  1. Adventure: Moving 2,000 miles to a new country and completely different culture (if you want to change cultures try moving from liberal, proper Canada to rough-and-tumble free-thinking Arizona ranch country!)
  • Consequence: Really, really like being my own boss
  1. Adventure: Raising 3 kids and deciding that, once again, the road less travelled and best for us all would be homeschooling them
  • Consequence: Brilliant, free-thinking children
  1. Adventure: Moving my family from Arizona to Colorado
  • Consequence: Learning to weed
  1. Adventure: Deciding to pursue quilting and fabric art full time as my little chickens graduated their high school and began pursuing their own lives
  • Consequence: Discovered I hate matching corners and love making my own patterns

Which is why we have to make adjustments and take detours on our life’s road.  As the poem so rightly puts it – “As way leads on to way, I doubted I should ever come back.”

Where it Bent in the Undergrowth

Where I started from is so far from where I am now, that an outsider would be left bewildered. But from the inside, my life’s journey has simply been way leading onto to way as I made the best decisions I knew out at every crossroads.  Robert Frost really nailed this concept because it is everyone’s story.

In my case, simply because I have that one rebellious gene that just hates being told what to do and how to do it, I wandered off into interpretive quilting and creating my own designs.  In other words, fabric art.

I will freely admit here that I get a real kick out of knowing that I have created something that is uniquely mine.

I deeply enjoy taking something that someone else has come up with, and figuring out a way to do it quicker, or easier, or cooler. J For instance, my girls needed a briefcase sort of bag to take to a conference, so I went to the quilt store and found 3 different patterns for:

  • A diaper bag,
  • A makeup bag
  • And a classmate bag for pens and notions

Then I took aspects of all 3 and came up with the media bag that is featured in this website.  The girls took it to their conference to test drive it and pronounced it “awesome”!  I deeply enjoy doing this.  I like to learn something new, like fractures, and then take it up another level or two.

Doubting that I Shall Ever Return

I would really like to encourage all of you to do the same, both in your lives and your quilting adventure.

If you’re going to live, live your own life the best you can, taking the road which is less traveled and, sometimes, much more difficult.  Because, in the end, what’s in your heart will be in your life, and the roads you’ve traveled will lead you where you need to be, rather than where other people think you should be.

As another example, I have to say that I find much of the “modern” patterns, colors and material choices less than inspiring.

I particularly loathe the combination of the pale teal and anemic coffee brown that is all the rage nowadays.  I also loathe the boring blocky shapes that they make out of everything – like strawberries and cats.

These colors and shapes really offend my sense of beauty.

You may have noticed that I lean towards bright colors, flowers, fantasy, and bling, so that’s what I sew.  It helps a lot that Suzanna and Leiajoy think the same way I do and that Suzanna is the Queen of Bling.  If you view much of our stuff, you will see that we are liberal in our use of “notions”.  I love what they add to a project!

So, feel free to express your individuality fellow travelers. You’ll have a few wrecks, but many more successes!

“May the road ever rise to greet you”